making smart prosthetics affordable
Team [REDACTED].
Electrical System.
The Juice.
We selected the Arduino Nano ($43.60) to be our microcontroller for this project. The Nano boasts an impressive number of I/O, Analog, and Power Pins for its compact size. Find below a list provided by Arduino on the specifications on this microcontroller.
Microcontroller...............................................Atmel ATmega168 or ATmega328
Operating Voltage (logic level)............................................................................5 V
Input Voltage (recommended).......................................................................7-12 V
Input Voltage (limits)......................................................................................6-20 V
Digital I/O Pins.........................................14 (of which 6 provide PWM output)
Analog Input Pins.......................................................................................................8
DC Current per I/O Pin..................................................................................40 mA
Flash Memory.....................................32 KB of which 2 KB used by bootloader
SRAM............................................................................................2 KB (ATmega328)
EEPROM.......................................................................................1 KB (ATmega328)
Clock Speed.......................................................................................................16 MHz
Dimensions..............................................................................................0.73" x 1.70"
Our electrical system is characterized by our use of sensors which include a potentiometer, accelerometer, and self-constructed pressure sensors. The total cost of raw materials for the electrical system is approximately $103. With our current set-up, our battery will last approximately 17 hours, and has a 12 hour charge time.
The Brains.
We're using a 3-cell LiPo battery for its lifetime and recharging capabilities. If considering doing this project again, we suggest investing in a slightly more expensive battery which affords a recharge safety circuit and higher voltage output (between 5-7 volts). We couple our battery with a Power Boost 500 to get the appropriate operating voltage. Detailed information about the booster can be found here.
Estimates for the current draw (in mA) as mapped to the motion keyframes (as described in the software section) is provided:
-
Rest- 83
-
Lift – 143-198
-
Grab- 125-176 (~240 when cuff servo is providing feedback)
-
Hold = rest
-
Release- 125- 176
-
Relax- 99 (quickly, then goes to rest)
The costs:
-
LiPo 3 Cell, $27.97
-
Power Boost 500, $9.95
-
2-pin Rocker Switch, $1.67
The Feels.
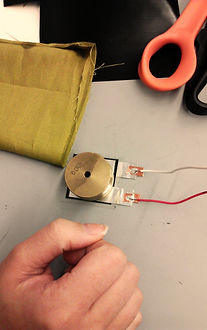
Sensors in our system are simple, and the true magic happens in the processing. A potentiometer is used to measure arm position, an accelerometer orientation, and piezoresistive pressure sensors calculate grip strength. A list of our materials and links to further information is provided bewlo.
The cuff uses:
-
10k Trim Pot, $1.25
-
Piezoresistive Sensor Pack, $14.95
-
3Axis Accelerometer, $5.85


Putting it Together.
Our electrical system diagram is shown to the right. Our recommendations for a system that might be sent to market would be a 5V+ battery coupled with a BEC to regulate voltage and current. Additional improvements could be made in the form of:
-
Amplifier circuit for each of the fingers
-
PCB for various small circuitry, especially for the fingers
-
Easy to pull connectors (for maintenance)
-
Audio potentiometer for robustness
-
More robust piezoelectric sensor pads
The main trade-offs with these improvements are cost and bulk.